
Rick Peterson
El Monte, California
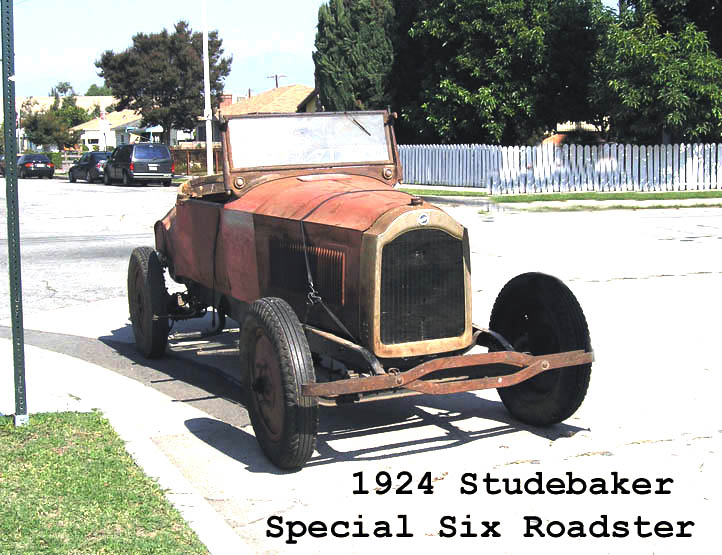
1924 Studebaker Special Six Roadster
Picking up My Newest Project
On October 25, 2004, I bought this 1924 Roadster off eBay. I knew from the description and photos that it was a true basket case. But, I figured that since I already owned another 1924 Roadster, if any of the parts were missing, I could use the other car for patterns.
Below is how the car appeared on ebay.


Up to Sacramento and San Francisco
My Dad and I drove up the following Friday but had to make a stop in Sacramento first. The passenger side door off my car had been mistakenly given to another person that had also bought another ’24 Roadster from the same guy off eBay as me. Yes, he had 2 cars on eBay and John Lucas had won the first car. I wanted to buy it also but funds were prohibited. That evening we meet with John and took pictures of his roadster. Then we were off for San Rafael as we had a 10:00am appointment the next morning to meet with Sheldon who had sold me the car. We arrived on time and my friend Rick Andersen and his brother Kent arrived shortly to help load my newest find. After a few hours of working and talking, we were ready to head back home to El Monte.


Home in El Monte
Oh, your right, my wife was mad at me again, but I think she is starting to get use to it. Here’s my Dad and my friend Ralph Baer are helping me get the ’24 off the trailer. The main objective was to get it out of the sight of my neighbors and into my back yard. And yes, I have the previously missing door back with the car.


The Beginning
Here is my start. I had to put pieces and box’s of parts away and do some organizing. The next step was for my Dad and I built a rack for the body so that it was movable. with a little help from some of my friendly neighbors we will able to lift it off. We also removed the head and did a quick check as to why the motor was stuck. Nothing could be seen from the top except that it has recently been bored and has new pistons. The problem must be down below. That will have to wait for another day.


Mounting a Big Six engine.
Next thing I needed to do was the tear the car down to the bare chassis. I wanted everything out of the way so I could try and mount a late Big Six engine in a Special Six frame.


Second attempt!
Well, the Big Six didn’t work as the newer 1927 style engine mount was smaller and wouldn’t fit in the older 1924 frame. So I tried installing a straight eight president engine and trans.


Unloading the “new”Commander engine.
While trying to mount the straight eight, I got a call for a running Commander Six with overdrive, perfect, I couldn’t pass it up. Since I had made the front engine mount for the straight eight and it would be the same for the six, it should almost bolt in.


Mounting the Commander.
Next, it was time to mount the late model Commander engine and trans on the 1924 chassis. I got a lot of the parts with this engine so it was really an pretty easy installation.


Finally … the third attempt is a success!
Installing the clutch and brake pedals.
I wanted to show how I made the mounts for the clutch and brake pedals since I had installed this newer engine and the mounts were not there anymore. I also had to move the battery box to this side to re-position as of the new location of the exhaust/muffler system.


Making the revamped frame look nice.
When I had done all the updates and finished stripping the frame, it was time to send it out for powder coating. Note how I used two of my engine stands to hold/move and rotate frame. Now it was time to install the cross-mounts and installed fully re-built gas tank.


Using the tools I have around my shop.
Here I’m using my engine puller to lift the frame and install the rear end. I just installed 2 eye bolts thru existing holes in the frame and lifted away. This worked perfectly! Then I installed the brakes and backing plates .


Installing a late Big Six front axle with brakes.
Once I got the rear end in, it was time to install the new rebuilt 1925 Big Six front axle with brakes. Note, I once again used the cherry picker to lift the front axle assembly up into place.


Installing the engine and transmission.
Now, it was time to install the freshly painted engine, powder coat rims and new tires. I also had a new drive shaft made. I will not use this fan as it would damage the water pump.


Installed painted engine and finished the pedals.
I then did some more work on the finished engine and then it was time to install the finished clutch and brake pedals. You’ll notice that I have put the body back on, I had to do this so I could make sure everything fit properly. No, I did not keep this water pump fan, it got removed.


Brake Rod Design and Installation.
In the first pictures this was the donor chassis. It’s was 1927 Commander sedan that I bought as a parts car. It came off a farm in Bakersfield and not much was left but I have used a ton of parts. The cradle from this car I still use in my engine rotisserie. The engine I have used numerous parts from it on my other cars. The transmission was sacrificed for the housing to put the T-5 5 speed in my 1927 Roadster. Almost nothing has gone to waste.


Finalizing the brake system.
Here the the finished brake system on my 1924. It was a real job using parts off the 1927 Commander parts car and installing all the pieces into a car that was never designed to have 4 wheel brakes. I just copied the dimensions from the 1927 and mounted them on the ’24. After a lot of sand-blasted and painting, it was finally done. the main problem I had was the front brakes did not work. I found out the the original brake arms on the front wheels were too short. I used the brake arms off the 1927 and they worked fine. Now I had front brakes!


Radiator Rebuild!
I needed to get the radiator out and get it rebuilt. It also meant that I would need to get the radiator shell chromed. Both turned out perfect!


The Front Radiator Frame Apron.
The painter I hired lost my front radiator apron. I got a Big Six front apron from my friend Joe. Of course it didn’t fit but I rebuilt it totally till it did. When I finished it, it looked great!


Trunk Rain Gutter and Hinges
The metal piece that goes around the edge of the trunk opening was missing. I was able to get 3 pieces of sheet metal and cut and form them to fit. I was also able to mark the location of the area so I could use the existing screw hole openings. I also found out that you can use the same hinges as the doors. I had two spares so the were temporarily installed to make sure they fit properly.


It’s time for mufflers.
I had most of the undercarriage done and needed to get the 1924 into the muffler shop. I put the ’24 on my trailer and took it over to my shop and left it for a couple of days. They had installed everything new and called me for a final inspection. It turned out perfect!


The ’24 is stored away.
It’s late in 2010 when we put the 1924 Roadster in the back corner of my garage. I had taken the body off after the muffler system was installed to do a few minor updates. But first, I needed to rebuild the engine in Mom’s yellow 1917 Studebaker Six Touring so it would be ready for her surprise birthday party. So the Roadster would have to wait a few years till its turn to be finished.


